
Setting up
Downloading Nessus Essentials
Snapshot To Save Space Or Incase Of Errors
This Lab builds on top of the Active Directory Lab. I recommend taking a snapshot of the Windows 10 Client before installing Nessus, in case you encounter any errors or want to save space. After completing this lab, restore it to the snapshot to free up space for future labs that will build on top of it.
Lab Brief Summary
The overall goal is to become familiar with the Nessus vulnerability scanner and to observe differences in the findings after each scan.
In this lab, we will perform a non-credentialed scan, followed by a credentialed scan, then a second credentialed scan after downloading deprecated software, and finally remediating any critical and high-ranking Vulnerabilities found.
Nessus Registration and Download
Use this link inside of the Windows 10 Client.
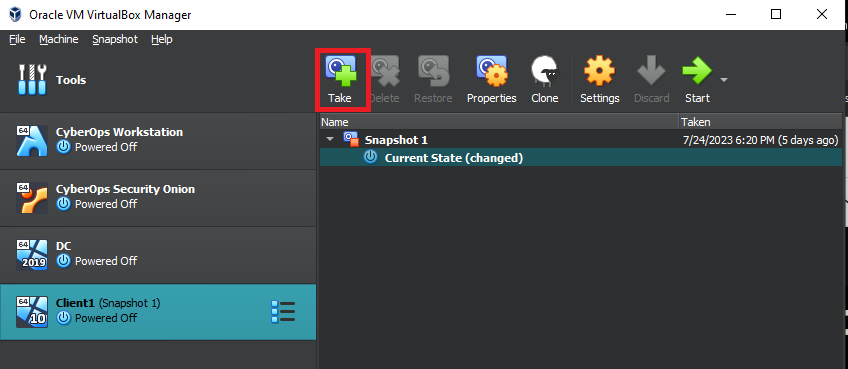
To make a snapshot, simply click on the “Take” button as shown below. Make sure that the Windows 10 Client is highlighted. If you ever need to use the snapshot, just click on “Snapshot 1” and the “Restore” button will be available to use.
Inside the Windows 10 Virtual Machine, I logged in with the “a-vcoil” account, the domain admin account we created in the Active Directory Lab.
Once inside, navigate to the URL above to register and download Nessus Essentials. You’ll have to enter your First and last name, as well as an email address. Once you plug those in, a button should appear to download Nessus. An email will also be sent to you with your activation code. There should also be a download button inside that email.
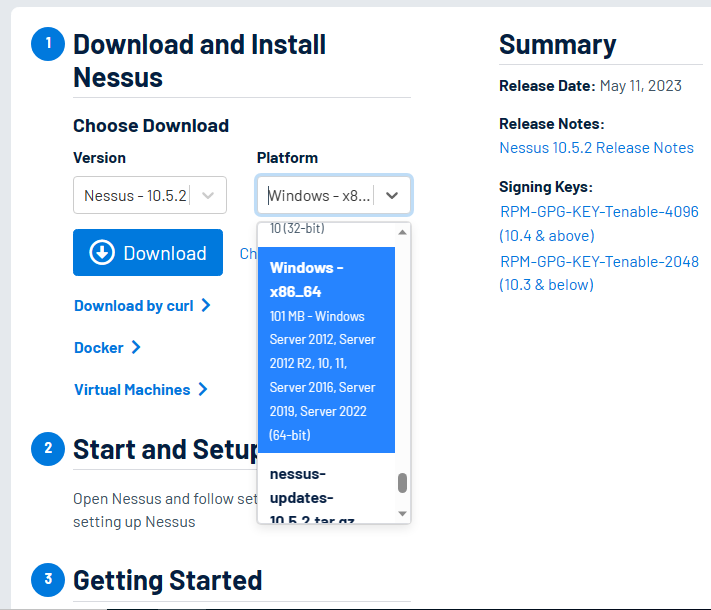
The version and platform selected can be seen below. Click download and accept licenses.
Once finished downloading, open the wizard and click Next. Accept the license agreements and click next.
You can leave the destination folder at the default location, click Next, and install. On the User Account Control pop-up window, click Yes. Then just wait for the installation to finish. Once done, click “Finish” to complete the wizard.
A webpage will appear. Click “Connect via SSL,” then “Advanced,” and continue to localhost.
If the window below appears, just click continue.
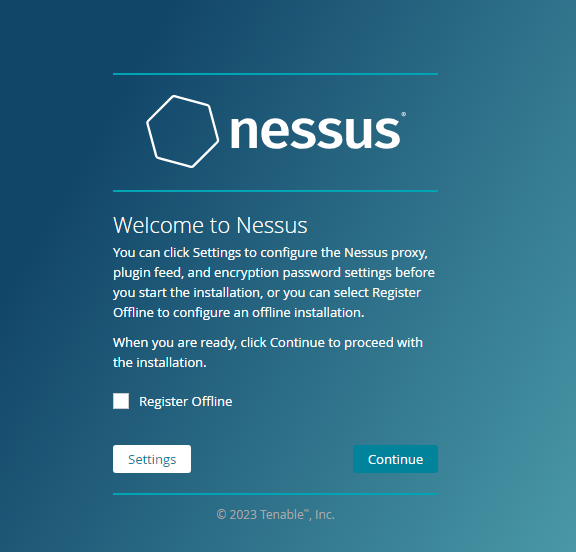
Once on the page shown below, click on Nessus Essentials and continue.
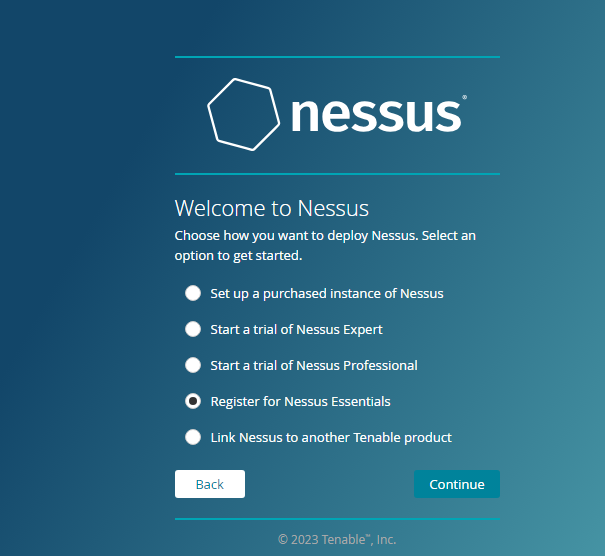
Click Skip and enter the activation code sent to your email.
Create a user account with a username and password that are easy to remember for this lab.
Then just wait for Nessus to initialize.
Once initialization is complete, you will be taken to a Nessus Essentials site that shows your scans.
I recommend you make a quick note of the URL, as you will have to come back to it later on after some restarts.
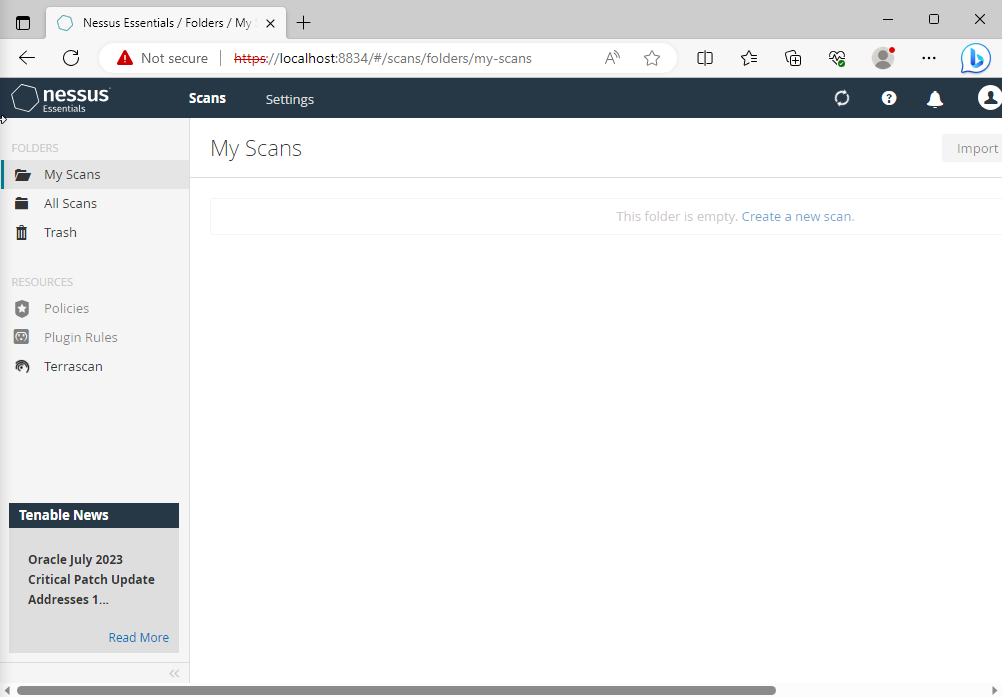
You may need to wait for the plugins to finish compiling before you can continue.
While it’s compiling, we can collect the IP addresses of the systems we are going to scan. Simply open the terminal and type ipconfig.
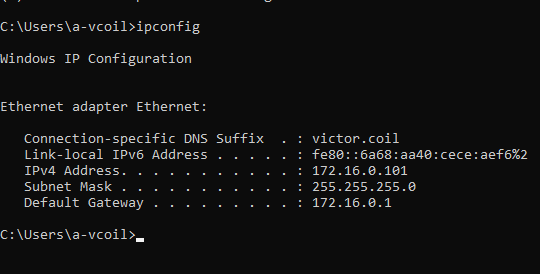
As seen above, the IP of the Windows 10 client is 172.16.0.101, and the IP address of the Domain Controller is 172.16.0.1.
Non-Credentialed Scan
Performing a non-credentialed Scan
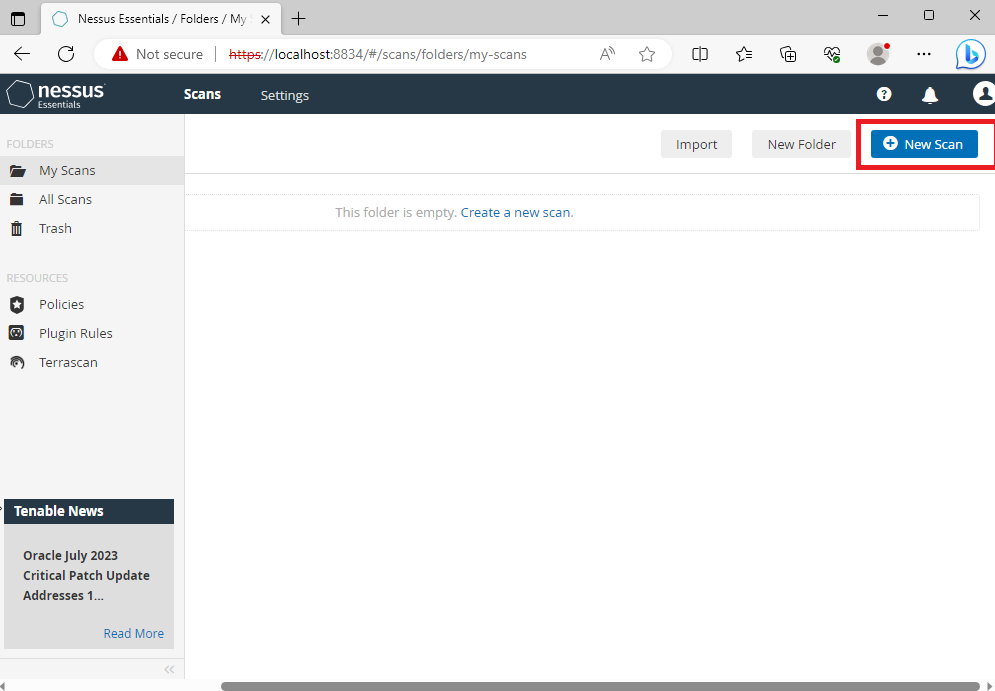
Once everything has compiled, click “New Scan”. You may have to scroll to the right a bit to see the button.
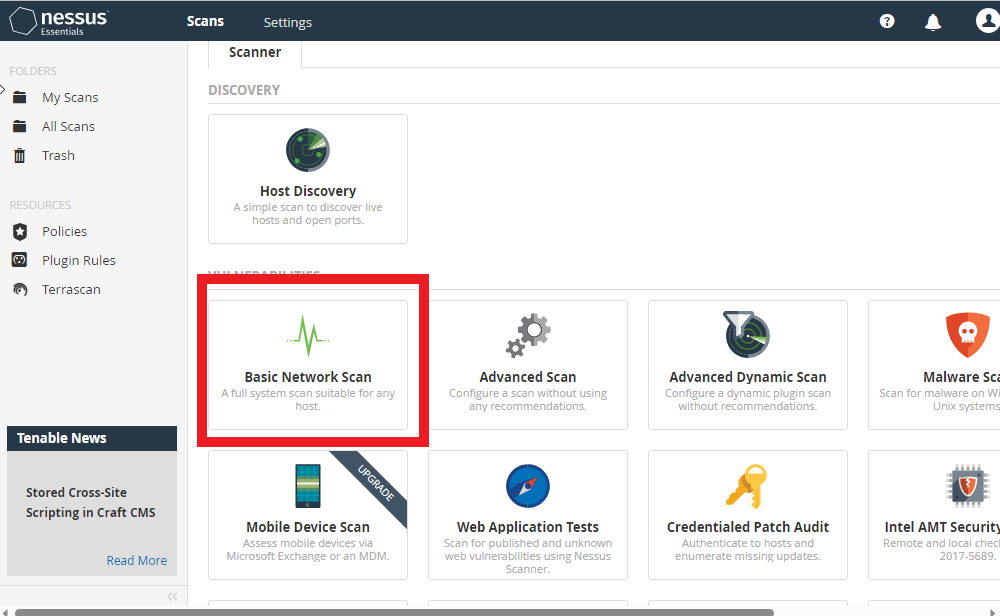
Then click on “Basic Network Scan” as seen below.
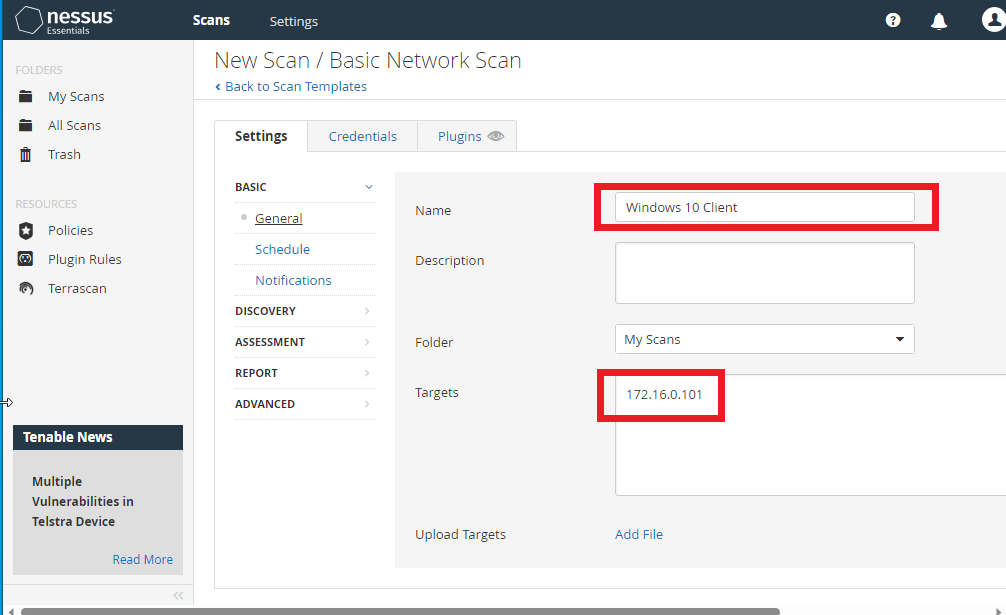
The first scan will be a non-credentialed basic scan. The image below shows the name I assigned to the scan and the target IP, which is the Windows 10 Client IP.
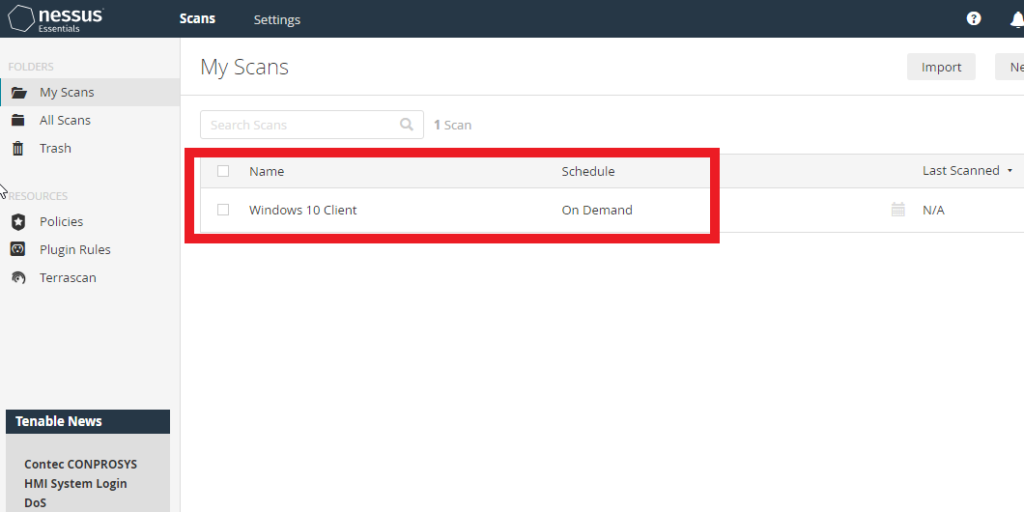
After making those two changes, just click save at the very bottom. We will be returned to the “My Scans” page, where a new scan will appear, as shown below.
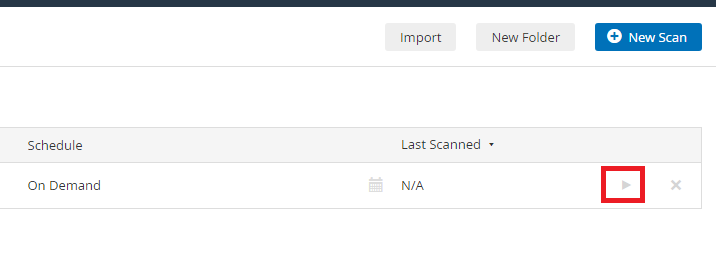
To start the scan, simply click on the arrow at the right side of the scan.
The green symbol shown below indicates that the scan is currently running.
Once finished, the green symbol will be replaced with a checkmark.
Once you see the checkmark, click on the scan to see the results. Below are my results for the Windows 10 non-credentialed scan.
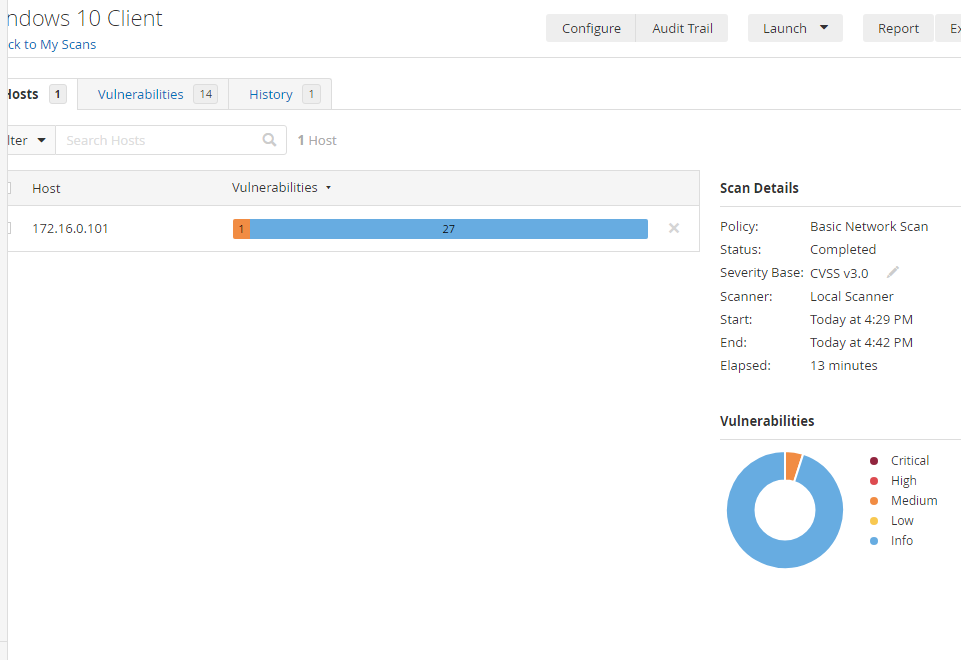
At the very top, you can click on the vulnerabilities tab and go through them. Vulnerabilities tagged with “Info” usually just want you to be aware of them. If you click on the medium vulnerability, it will also provide solutions to mitigate or patch it.
Credentialed Scan
Performing a Credentialed SCan
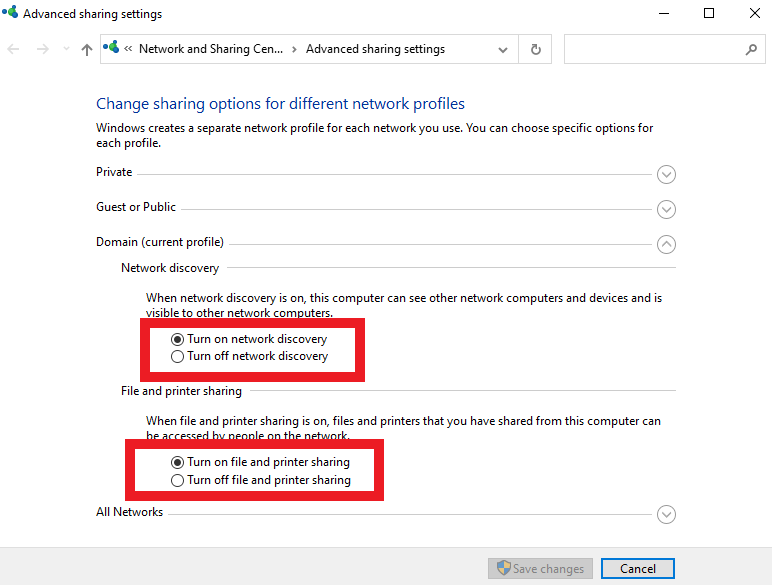
Now for a Credentialed scan. This will allow the scan to go deeper and find more vulnerabilities. Before diving in, we need to make sure that network discovery and file/printer sharing are on.
On the Windows 10 Client, go to the search bar and type in “share”. Click on the option shown below.
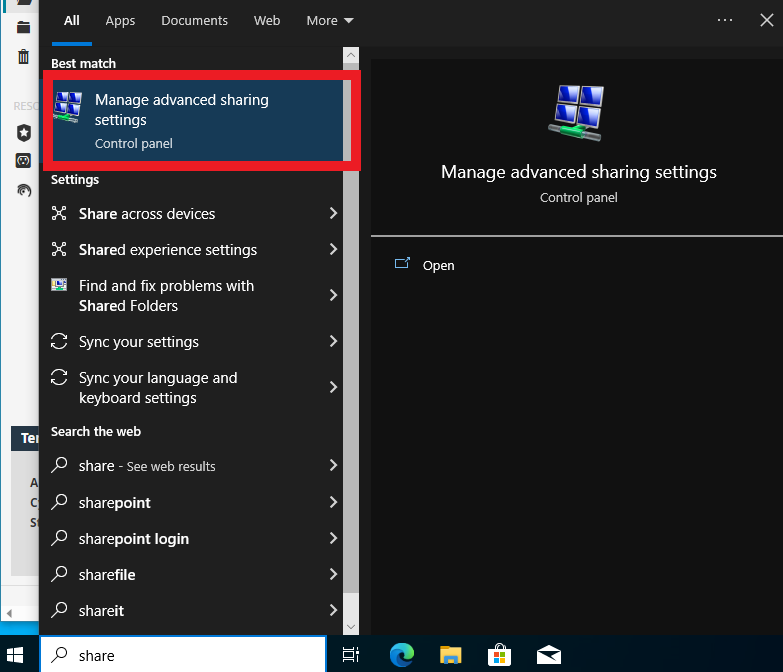
Make sure that the two options shown below are turned on.
After those changes. Let’s now perform a credentialed scan.
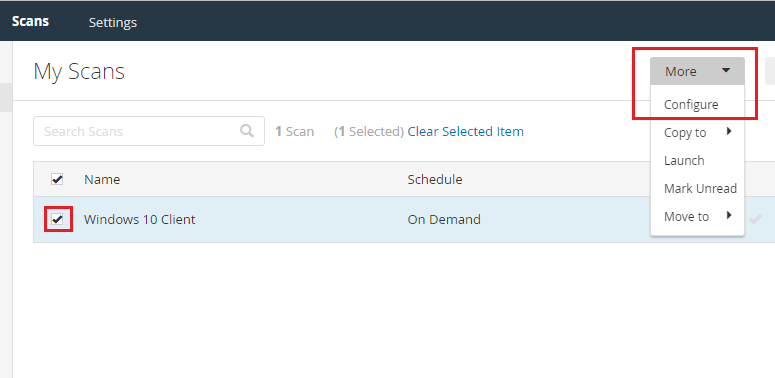
On the top left, click on “My scans”. Once back at the “My Scans” page, click on the check box to the left of the scan name, and a new box will appear at the top. Click on more, then configure.
Then click on Credentials at the top, then “Windows” as shown below. Fill in the Username and Password with the account you are using on the Windows 10 Client.
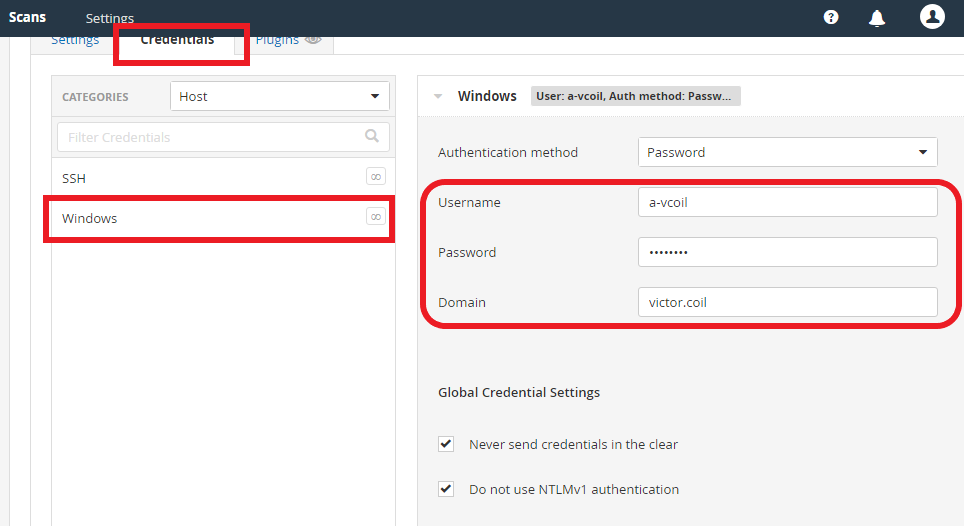
After adding these credentials. Click “Save” at the bottom and go back to the “My Scans” Page. Then run the scan one more time.
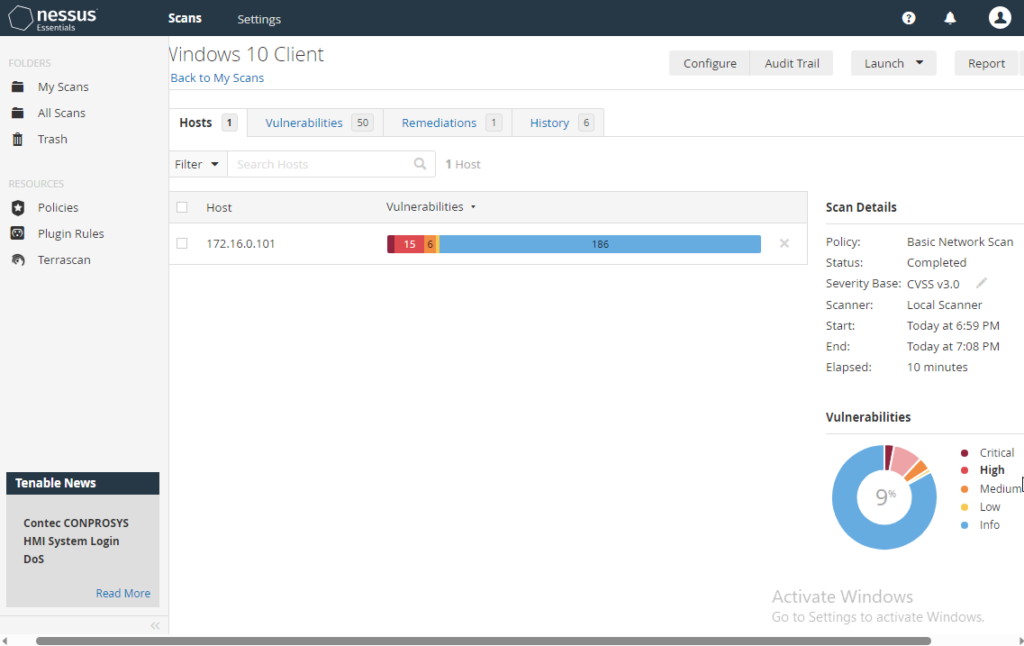
Because this is a credentialed scan, we will see more vulnerabilities. Once this scan finished for me, there were 4 Critical vulnerabilities and 15 High Vulnerabilities. These vulnerabilities were mostly just Edge and other Windows Native Applications that just needed to be updated.
Credentialed Scan with Deprecated Browser
Performing a Credentialed Scan with deprecated Firefox
Let us explore and see what a single deprecated app on our systems can do.
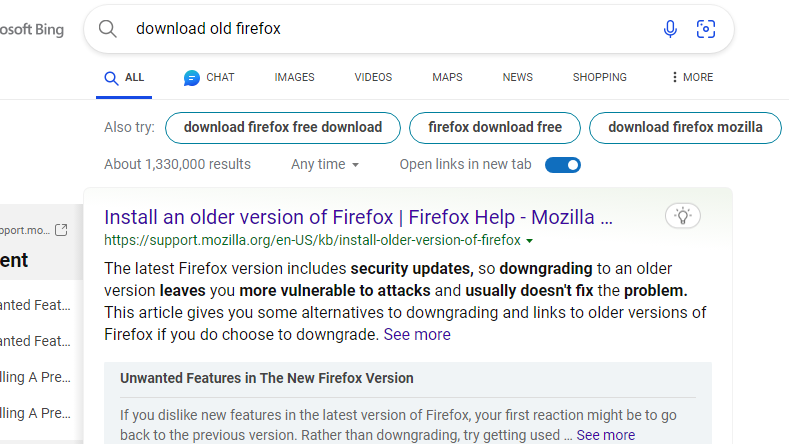
The deprecated app that I will use is Firefox. Google “Download old Firefox” and click the first link shown below.
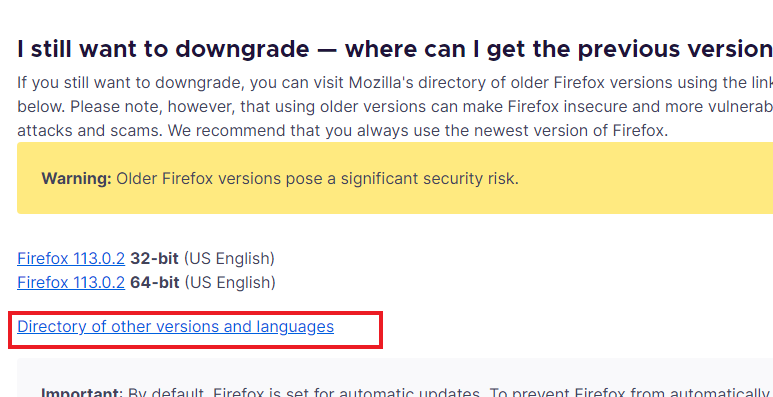
Inside that link, scroll down until you see the section shown below, and click on the link with the red box around it.
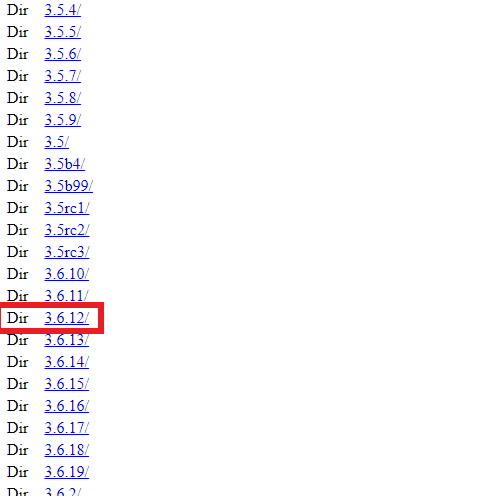
Then scroll down until you see 3.6.12
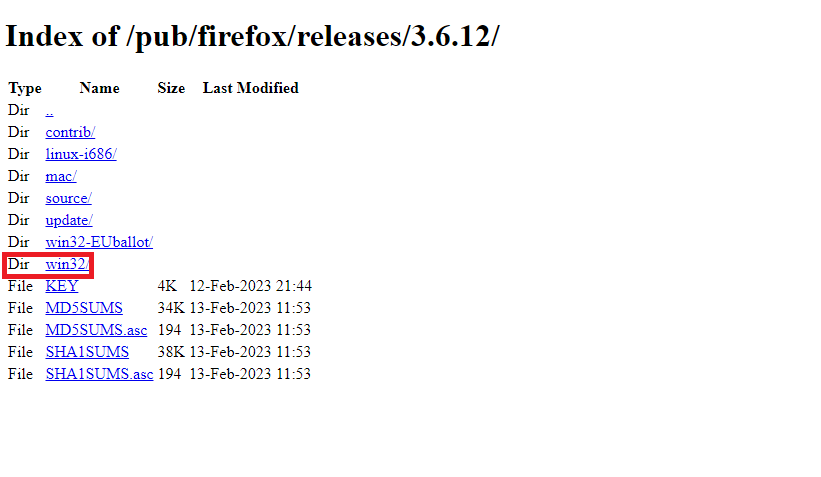
Then click on “Win32”
Then click on “en-US/”
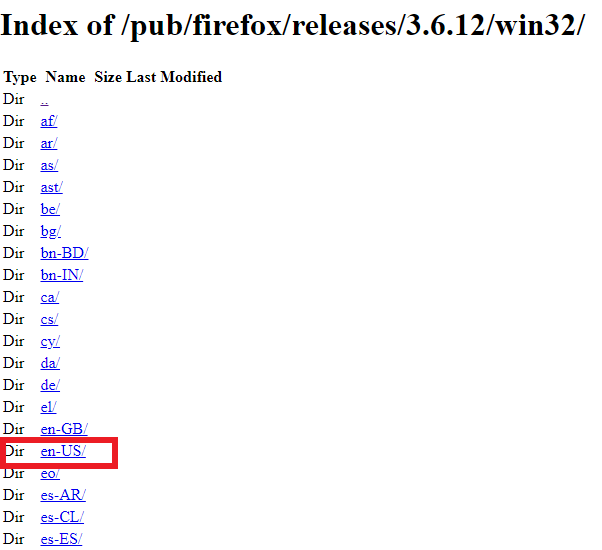
Then select the top .exe file. Once downloaded, in the wizard, just keep all defaults and standards, keep clicking next, then install.
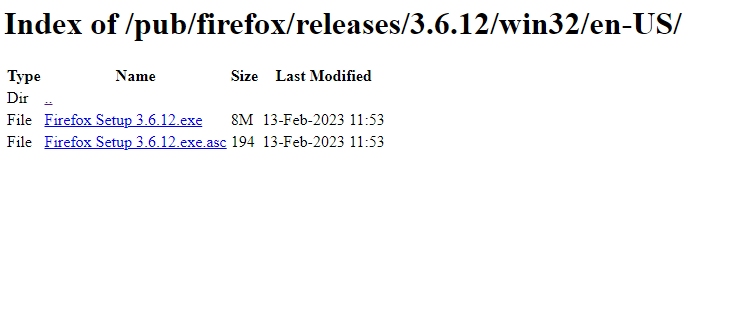
Once Firefox is done downloading and installed. Go back to Nessus and restart the credentialed scan.
Once the scan is finished, we can see that many more critical and high vulnerabilities are now present.
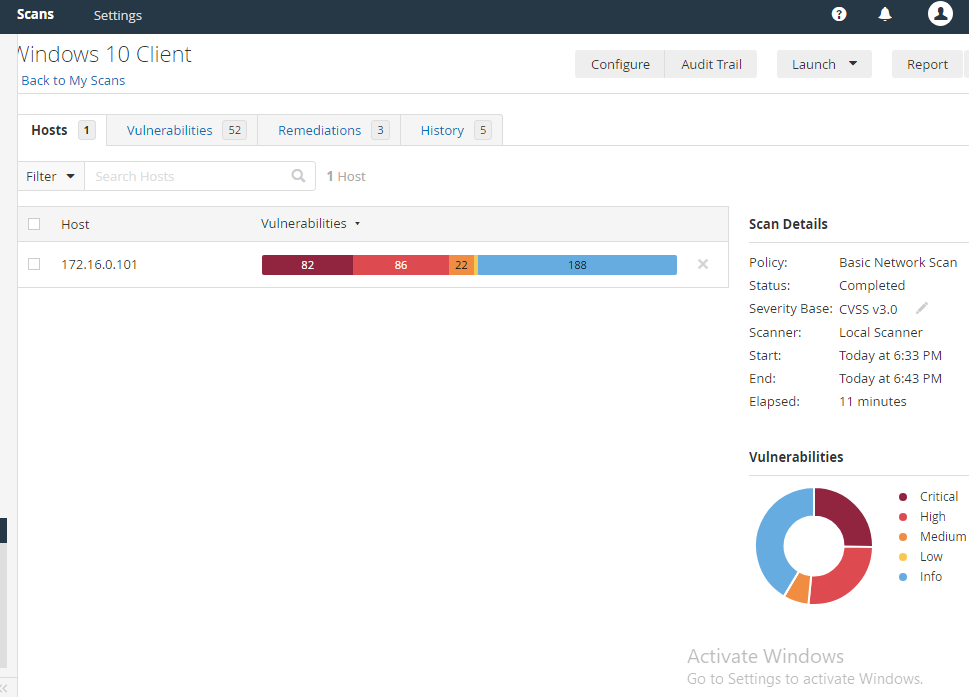
From 4 Critical, 15 High, 6 Medium, and 1-2 Low. To 82 Critical, 86 High, 22 Mediums, and a handful of lows. All of this is from just Firefox.
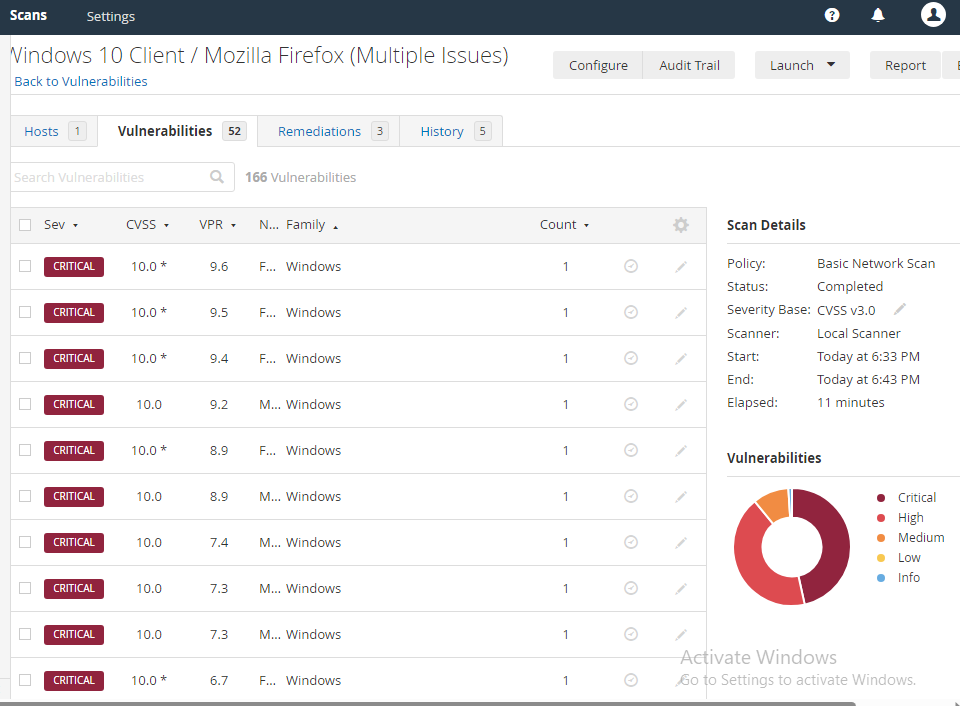
The remediation section tells us that we can upgrade to remediate the vulnerabilities. But we can also just delete Firefox. We can usually approach many applications this way. If you don’t use it, get rid of it. This helps reduce the attack surface.
Sometimes, there will be situations where you can’t just get rid of it and will have to research on available patching to remediate the vulnerability. Even worse, there are times when you can’t patch, as it can disrupt business operations. The call will have to be made to just accept the risk.
Remediations
Remediating the Vulnerabilities
Let us do the obvious here and delete the deprecated Firefox. This will eliminate most vulnerabilities.
In the Windows 10 Search Bar, search for “appwiz.cpl”
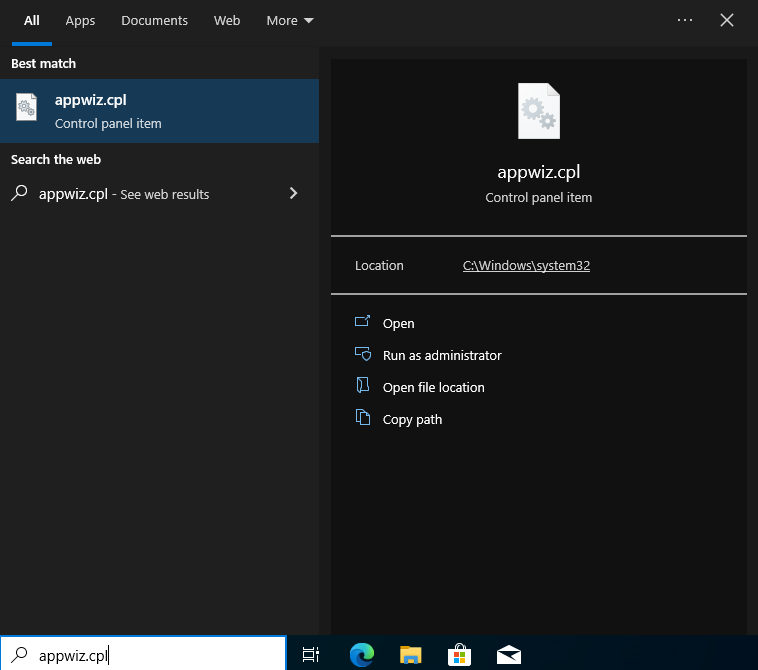
This will open the Control Panel, Programs and Features. Just right-click on Firefox and uninstall.
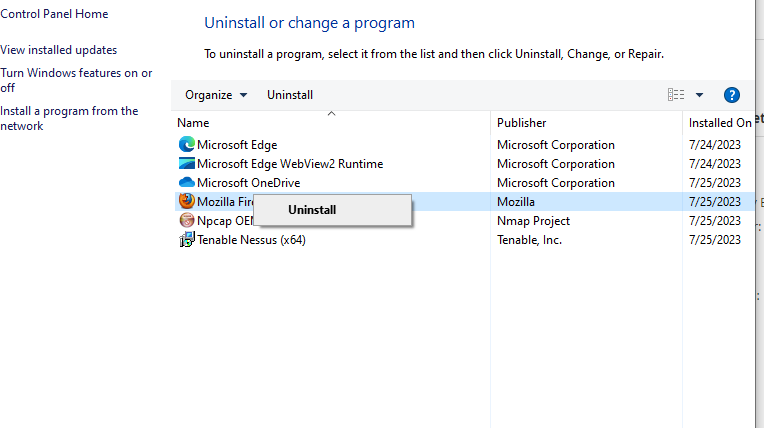
In the wizard, click Uninstall and Next.
After getting rid of that, let’s run a Windows update. You can do this by clicking the start button at the bottom left of the screen, then clicking settings (the little widget), then “Update & Security”.
As shown below, there are a handful of updates. Just click on Install now. Once finished, click restart PC.
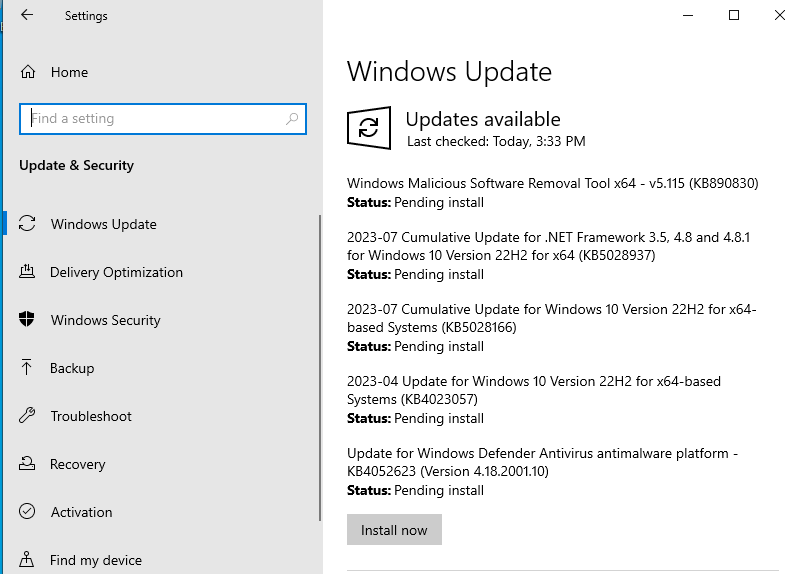
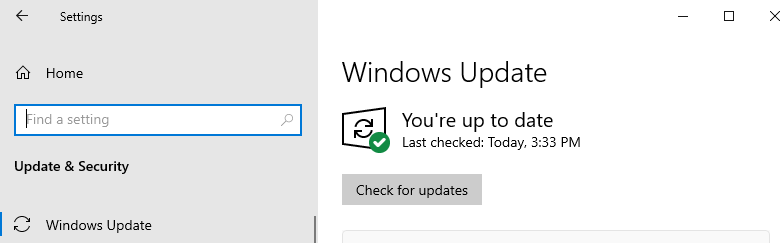
After resetting and seeing that there is nothing else (Make sure you click on “Check for updates”. You may have to do it a couple of times.)
After that, Open up the Microsoft Store. There will also be app updates available here.
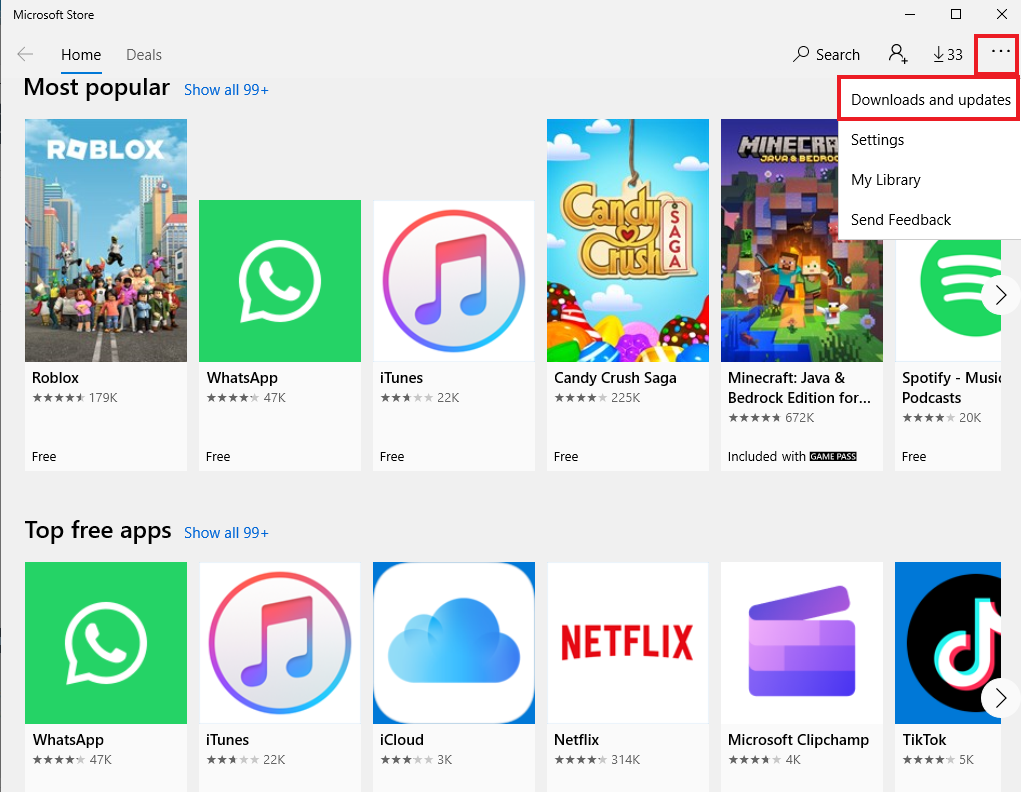
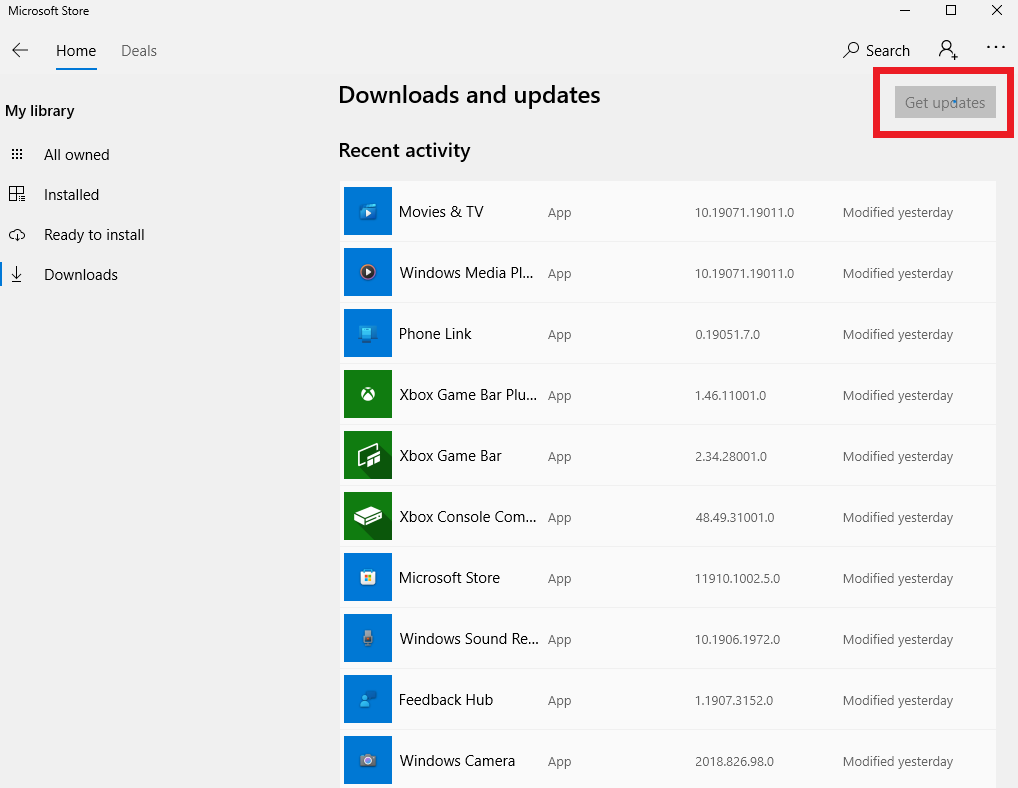
The whole layout of the store may change a bit after the update. The second layout, this is where I was able to find the updates.
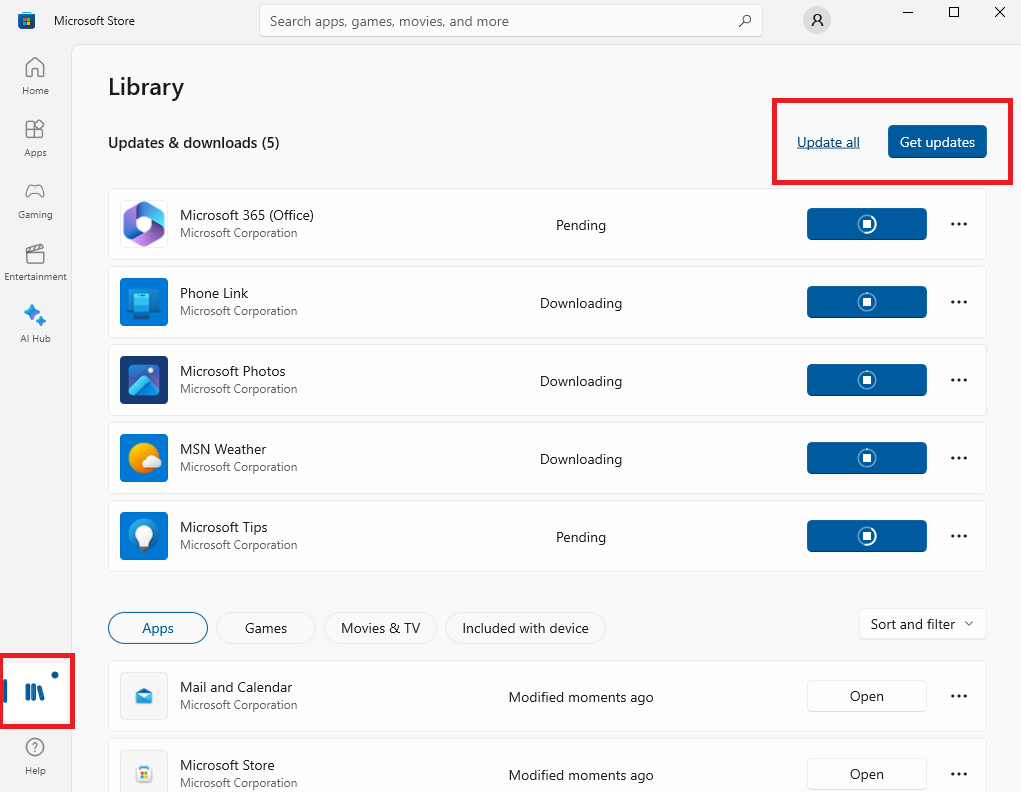
After performing these updates, rescan the system.
As seen below, the critical and Highs have dropped dramatically.
With 1 Critical, 1 high, 2 medium, and 181 info.
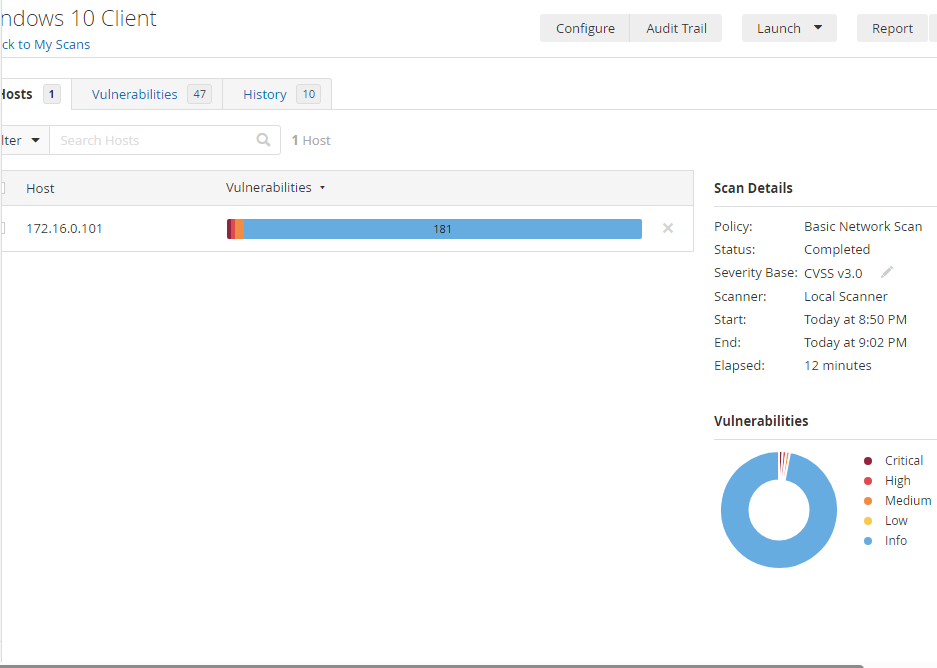
The critical point shown above is that Internet Explorer isn’t turned off, and some of its features can be used against us. We have to disable and create a specific registry key. Let’s continue remediating.
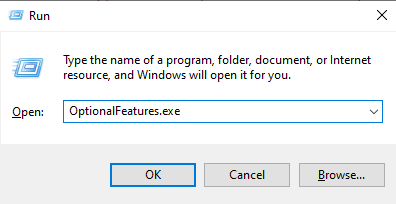
I clicked on the Windows key and the R key at the same time. In the little pop-up window, I searched for the executable shown below.
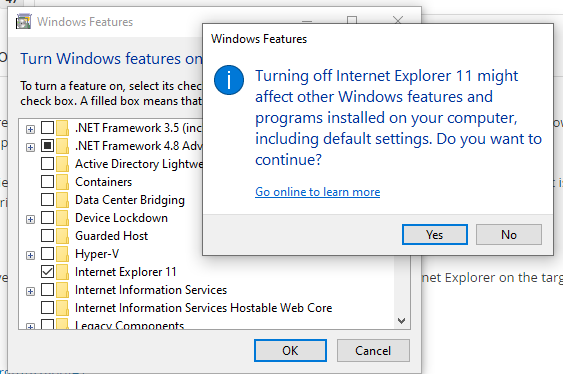
Then unchecked Internet Explorer 11 and clicked Yes. After this, you will have to do a quick restart.
Now for registry keys. Click on the Windows Key and R key, then search for “Regedit”.
Navigate to “HKEY_LOCAL_MACHIENS\SOFTWARE\Policies\Microsoft\Policies\Microsoft”.
Right-click on Microsoft and create a new key. Name this new key “Internet Explorer”.
Then, create a subkey by right-clicking “Internet Explorer” and selecting “Key”. Name the new key “Main”. Then right-click “Main” and make a DWORD (32-bit). Name this one “NotifyDisableIEOptions”. Right-click on the newly created DWORD, and click “Modify”. Set the value data to 1.
These changes will handle the Critical Vulnerability.
Nessus tells us that the High is our vulnerability to CVE-2013-3900. Their solution requires us to add “\wintrust\config\EnableCertPaddingCheck”.
Inside of Regedit, Move over to “HKEY_LOCAL_MACHINE\SOFTWARE\Microsoft\Crytography”
Right-click on Cryptography. Hover over New, then click on “Key”. Name the first key as “Wintrust”. Then right-click on Wintrust and create another key. Name this subkey “Config”.
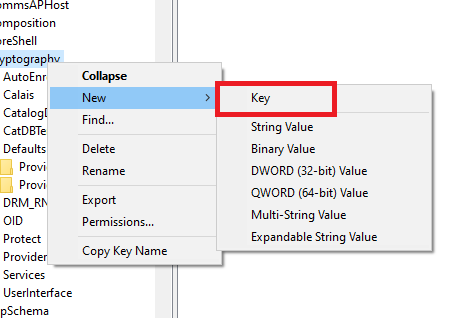
Right-click on “config” and instead of making a new key, click on “DWORD (32-bit)”. Name this “EnableCertPaddingCheck”. Once made, double-click it and as shown below, put 1 in the value data field.
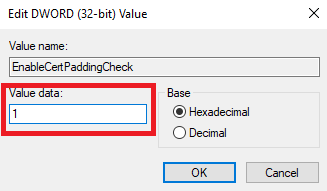
Then move over to “HKEY_LOCAL_MACHINE\SOFTWARE\WOW6432Node\Microsoft\Cryptography”. Right-click on Cryptography and create a new Key with the Name “Wintrust” and then another subkey with the name Config. Then right-click on Config and do a DWORD (32-bit), name it EnableCertPaddingCheck. Then right-click on it and set the value to 1.
After making these changes and running one more scan, there were only 2 medium vulnerabilities left, with 185 Info-level vulnerabilities.
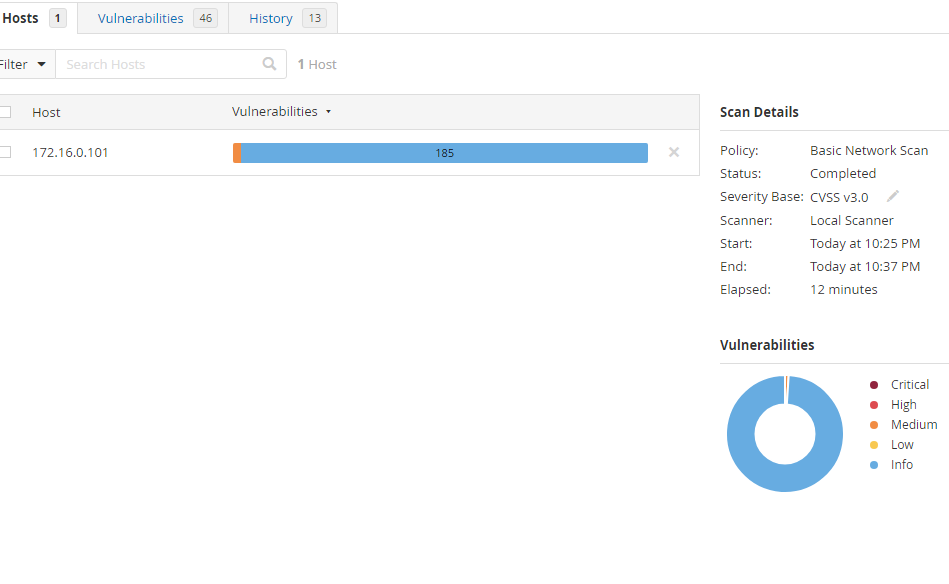
We can simply accept the leftover vulnerabilities. We successfully removed all critical, high, and a handful of medium and low vulnerabilities.
This concludes the Vulnerability Management Lab.